Steps to follow when the microphone is not working on windows 7
Users sometimes report that they are facing issues with Windows 7 and the microphone or the headset is not working properly. This situation can be extremely frustrating, especially when one is on an important meeting, call or even when one is accessing their system for recreational purposes.
In order to assist you in fixing this problem, we have simplified few steps that you can follow.
Before we begin let us look at some of the common causes for the microphone not to work on your Windows 7.
1. There could be an ongoing issue with your microphone: The very first thing that would often come to our mind is that there could be potential hardware damage and hence the microphone was non-functional.
2. Something is wrong with your port: It could also be the case that there was some issue with the port of the microphone. In that case, simply test different ports or just look for a replacement.
3. Your audio drivers are damaged or simply outdated: Drivers are very important to your system. Hence, it could be the case that the audio drivers are not in a good condition and hence the microphone was not working properly.
4. The microphone device is disabled: It could also be that someone or some application has tampered with the settings of your microphone and hence it is not working properly.
5. Your microphone could be muted: It is not always the case but it could be that you have left your microphone accidentally muted.
Now, let us look at some of the troubleshooting techniques in order to fix the issue:
Method 1: First of all check if there are any manual issues
Your first step should be to understand if there is any hardware issue or not. In order to verify this, we have compiled some useful steps to assist you in the process. First of all,
a) Plug your microphone from the port and wait for a few seconds before you plug the microphone back in. One must ensure that the microphone is also being plugged in the right port.
b) Now try using the same microphone on a different device. Testing whether your microphone is working perfectly on a different device or not is crucial as it can help you identify any potential software error. In case you see that the microphone is not working on a different laptop then it sure is faulty!
c) Test if Windows 7 can pick any audio. If your microphone fails to work on certain applications then you might have to look deeper into the application settings.
Here is a short tutorial on how to test your microphone on Windows 7:
Open the Start Menu and select the control panel from the right-hand side of the menu.
Make sure that the view mode is set to ‘ category’.
Click Hardware sound, then select Manage audio devices
Switch to the recording tab and speak into the microphone. If you are able to see some green bars this means that the Windows 7 is picking up audio.
Method 2: Making sure that the microphone is not muted
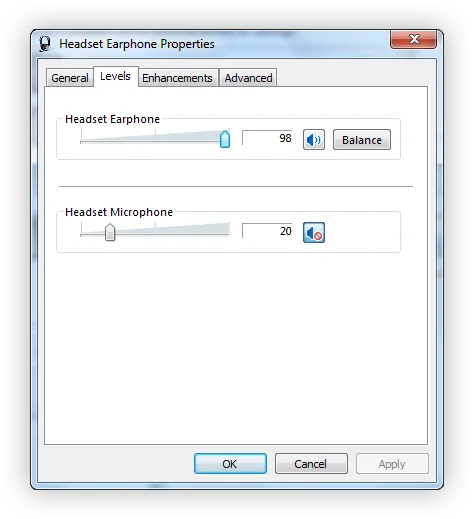
Many users reported that they were not able to use the microphone as it was muted in the system itself. There is an easy way to check this issue.
a) Open the start menu, and then open the control panel from the right side of the menu.
b) Make sure that the view mode is set to category.
c) Click on hardware and sound and then select manage audio devices under the sound category.
d) Switch over to the recording tab and double click on the microphone in order to see its properties.
e) Click on the Levels tab
Method 3: Setting your microphone as the default
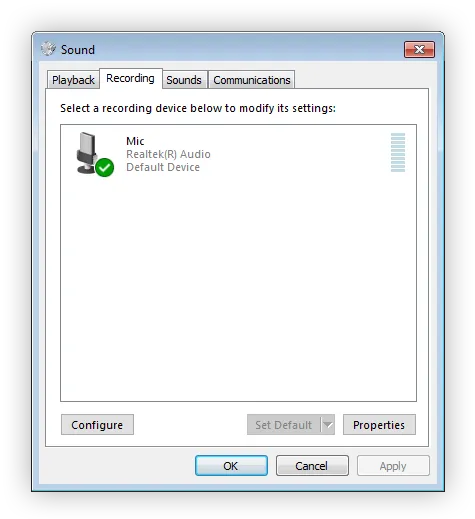
Setting your microphone as the default can help you get rid of any issues related to it. The process is simple to follow:
a) Open the start menu and then the control panel from the right side of the menu.
b) Your view mode should be set to category
c) Click on hardware sound and select manage audio devices
d) Switch over to the Recording tab.
e) Now select your microphone and set it as the Default option.
f) The next steps although optional, are highly recommended to ensure that the microphone is recognized by all apps. Now double click on your mic and switch onto the advanced mode.
Method 4: To run the audio troubleshooter
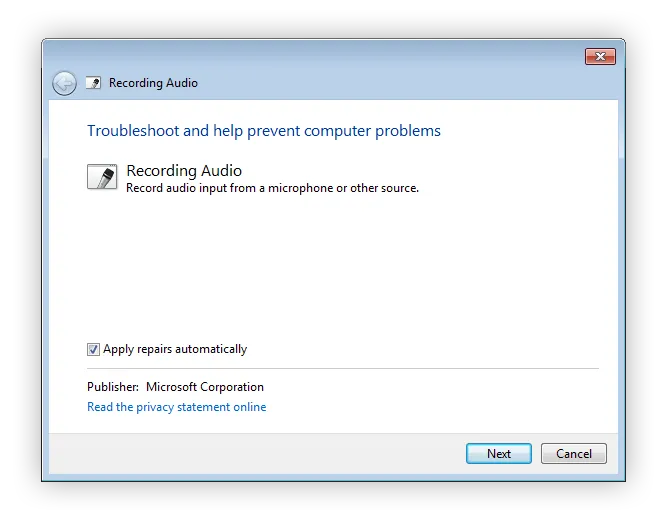
Windows 7 comes with a variety of troubleshooters to help fix most of the issues. Here are a few steps if you want to run the troubleshooter.
a) Open the search bar and type the words troubleshoot in the search bar. Now select Troubleshooting from the list of the options available.
b) Select the troubleshoot audio recording link as it appears under the hardware and sound header.
c) Now click on the Advanced button that appears on the bottom left of the troubleshooter window. Now make sure that the button Apply repairs automatically is clicked.
d) Click the Next button and wait for the troubleshooter to detect the issues.
e) If the recording audio troubleshooter is able to find any issues it will fix them automatically.
Method 5: Restarting the Audio Service
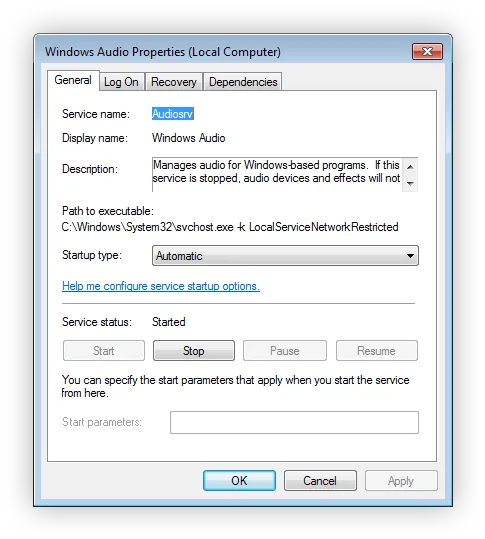
It is quite possible that the audio services could have been accidentally disabled or by any application interference. In this situation, a restart of the service can do great results.
a) Press Windows + R on your keyboard and open the Run utility. Now type services. msc and click Ok.
b) Scroll down until you see ‘Windows audio’, then right-click and choose Restart.
c) After the audio service has restarted, right-click on it and choose Properties.
d) a) Now make sure that the start type is set to Automatic. You can also change it by opening the drop-down menu and clicking on the Apply button.
Method 6: Updating your audio drivers
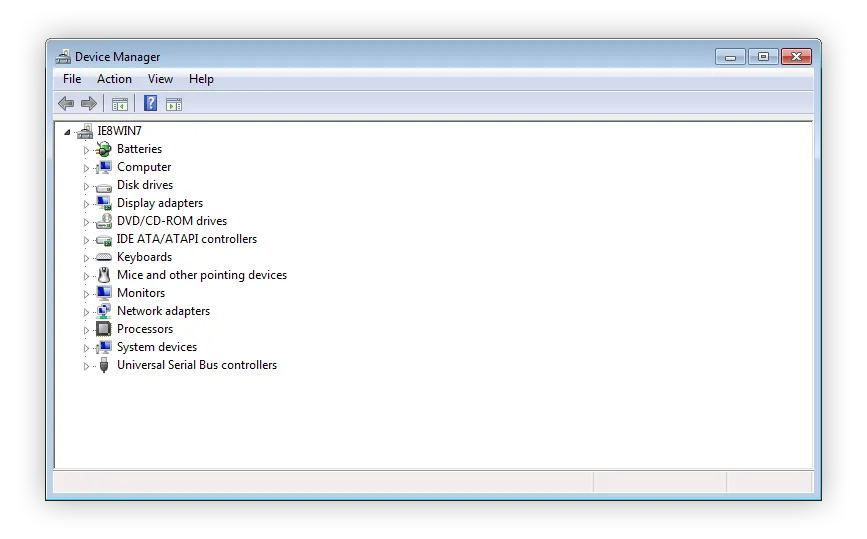
It is also possible that the audio services could have been accidentally disabled or by any application interference. In this situation, a restart of the service can do great results.
a) Press Windows + R keys on your keyboard to open the Run utility. Here, type in “devmgmt.msc” and click the OK button.
b) Now expand the Sound, Video and Game controller
c) Right-click on the listed audio device, then select Updating audio drivers software
d) Now search automatically for updated driver software
e) Now wait for Windows 7 to find and download the driver. If you cannot find any then try to find them manually on the internet by typing the audio device name.


